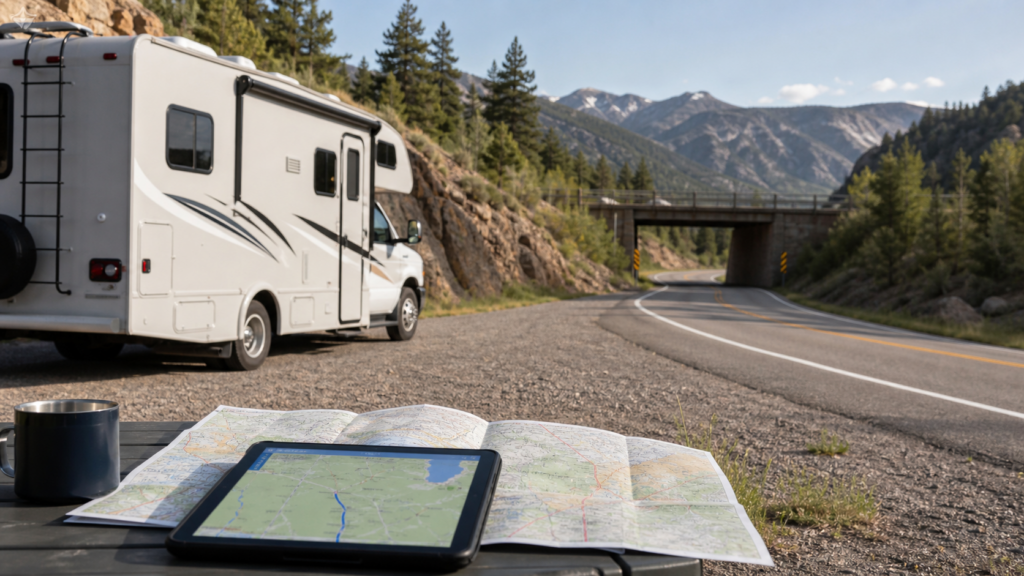
How to Plan an RV-Safe Route Before You Hit the Road
RV miles is not car miles. What may seem like a straightforward drive on the cell phone screen can turn into a long, hot, and sweaty afternoon when you’re towing a travel trailer through a small town, keeping an eye out for overhanging branches, and realizing the next gas station is designed for compact cars.
That’s why there needs to be an RV safe route planning process. Going the short way doesn’t mean it’s the safe way for a motorhome, fifth wheel, travel trailer or camper van. All of this must be taken into consideration: height, weight, length, grades, fuel access, weather and final approach into campground. Regular navigation can help, but should not be the sole tool in making decisions when it comes to a big rig.
Follow this guide as a helpful workflow for RV road trip planning before hitting the road.
Why RV Route Planning Is Different From Car Navigation
A poor route for a passenger car can be made up for rather easily. If you miss your turn, go around the block, duck into a parking lot or take the next side street. The same repairs may be difficult or impossible in a RV. It might not be possible to turn around. Bridge ahead may not be large enough to fit under. You could be forced downhill on a slope which you can’t brake down.
Compared to a regular car, an RV is taller, heavier, longer, wider and takes longer to stop. Adding a towable rig increases hitch length, swing, backing difficulties and significantly increases turning radius. A proper RV route planner should be considered more like a driver than a map.
If a route does not answer these questions, the route is not RV-safe:
- Would the RV fit under bridges, tunnels, trees or fuel canopies?
- Are there any roads or bridges with weight limits?
- Does the rig have the ability to deal with the grades, curves and descents?
- Can you easily get on and off the fuel stop?
- Are you able to access and maneuver in the campground?
- What are your backups in case it changes due to weather, traffic or construction?
There is no one RV GPS app, paper atlas, campground review or satellite image that is perfect on its own. The trick to avoiding trouble is cross checking.
What Makes a Route "RV-Safe"?
Clearance: Bridges, Tunnels, Tree Limbs, and Canopies
The first number, every RV traveler should be familiar with is true height. Not brochure height. That is not the number you had prior to installing a second air conditioner, solar panels, vent covers, a satellite domed roof or a roof top cargo box. Measure the rig with it loaded for travel.
Old railroad bridges aren’t the only places with low clearance issues. Look out for tunnels, hotel entrances, campground trees, old park roads and gas station canopies. Those looking for low clearance RV routes or avoid low bridges RV are looking for a way to solve a problem: normal maps can send an oversized vehicle down the road that was not designed for it.
Leave a cushion. Usable clearance may be decreased by road resurfacing, snowpack, arch shape, lane crown and sign errors. If you have any doubt about the RV bridge clearance or RV height clearance, take it easy, check, and find an alternate if necessary.
Weight: Bridges, Local Roads, and Restricted Routes
It is important to consider weight on bridges, in rural roads, park roads and on old streets. It’s not the dry weight stated in a sales brochure, but rather your loaded weight.
When towing, have knowledge of the towing weight and load of the trailer. When taking the leap from driving a pickup truck to a fully loaded truck and trailer, RV weight restricted roads become a major concern. Federal bridge inventory data is available via the National Bridge Inventory, but should be viewed as general information about bridges and not as a route clearance guarantee. Signs and official restrictions take precedence, and are to be followed over any app.
Length, Turning Radius, and Tight Roads
Length is not the only factor that influences camp site fit. It transforms fuel stops, U-turns, switchbacks, city streets, campground loops and scenic pullouts. A 30′ trailer can equate to a 50′ truck and trailer combination on the road.
For travel trailer route planning and fifth wheel route planning, note the trailer’s length and the overall length of the combination. For motorhome route planning, add bike racks, cargo trays and towed vehicle(s).
Grades, Braking, and Mountain Driving
A very big climb may be a slow climb. If you are descending a steep hill, slow down as you might get in trouble if you start out too quickly or brake. When choosing a "steep grades RV route", consider elevation change, mountain pass notes, weather, and alternate routes.
Use low gear when going downhill; slow down before the downhill. Easier miles is more important than shorter miles, in an RV.
Campground Access and Site Fit
The last 2 miles can be the most challenging. Entrance grades, low limbs, narrow gates, tight loops, soft shoulders and back in angles are all part of RV campground access.
Campsites length is not the only fit factor, as the National Park Service reminds us. However, RV/Trailer length limits may vary as many sites are not pull-throughs and the length of road access and turning radius do impact what will fit, Yosemite notes. New River Gorge also states that RV access is dependent on size, with many trailheads lacking medium or large RV parking and large RVs not recommended at its drive-in primitive campgrounds.
Step 1: Measure Your RV Before You Plan the Route
Prior to open any RV navigation app, measure and record the numbers which control the trip.
Record True Height, Length, Width, and Weight
Include rooftop equipment in height measurement – level ground. If possible, measure bumper-to-bumper length, total length of combination when towing, width (with mirrors extended) and loaded weight. Leave these numbers in feet and inches (and inches if your app requires it).
Write at least:
- Overall height
- Overall length
- Total combination length
- Width
- Gross vehicle weight rating
- Gross combined weight rating, if towing
- Actual loaded weight (where known)
Write the numbers out so that they can be seen. A note on a dashboard card or a note on the lock screen of a mobile phone providing height, length, width, loaded weight, license plate and roadside assistance number is sufficient. Recheck following the installation of roof storage, solar panels, cargo carriers, bikes, vent covers or hitch accessories.
Step 2: Use an RV Route Planner, Not Just a Car Map
Google Maps and Apple Maps are very helpful, but not sufficient for big-rig routing. Google Maps for RV travel can be used for traffic, go to a satellite view, local searches, and street level context. It should not be the sole routing source for height/weight limits, propane restrictions, long trailer maneuverability, etc.
What an RV-Specific Planner Should Let You Enter
Any good RV trip planner or RV safe GPS will allow you to input the information that is important:
- Height, length, width, and weight
- Propane restrictions
- Toll and ferry preferences
- Road type preferences
- Daily drive-time targets
- Fuel range and campground stops
Certain tools may be able to advise on avoiding low bridges or routes that have some restrictions. RV LIFE stores RV Routing preferences and settings to avoid route features like ferries, tolls and low bridges. Furkot’s RV routing help highlights the need for user to enter RV height, width, length, weight and axle load, in order for the route to take into account the size of the vehicle. Settings may differ depending on the feature, so don’t assume that the app knows your rig.
The best RV route planner is typically made up of a mix of tools:
- GPS or RV navigation system for the unit
- Web-based trip planner
- Low-clearance map or database
- Truck atlas as a paper backup
- Campground apps and recent reviews
- Satellite view of fuel stops and entrances
The idea is to "catch" the problem as a pin on a map.
Step 3: Cross-Check Low Clearances and Restricted Roads
Once you’ve constructed the course, inspect it as a driver does. Be extra alert for older roads, parkways, railroad underpasses, historic areas, covered bridges, tunnels and scenic roads. When a clearance warning is in your vicinity, check with another source. If your road sign conflicts with your app, trust the road sign!
The same applies to the weight limits posted. App data can be updated more slowly than local restrictions. Construction detours can also lead you to roads you wouldn’t otherwise be going on purpose.
The same treatment is warranted for the national parks. New River Gorge cautions that a few locations have narrow, winding, sometimes unpaved roads, medium or large RVs are not advised on certain roads and RVs that are taller than 12 feet may not be able to access Fayette Station Road due to a low clearance bridge.
Step 4: Review Grades, Weather, and Fuel Stops
Plan Mountain Passes Before the Day You Drive Them
Avoid waking up to that info at breakfast: today’s route involves a long downhill, strong winds and a storm warning! Review grades, pass and weather conditions the night before. If you are not used to driving in the mountains, opt for main roads instead of shortcuts.
Choose Fuel Stops Around RV Access
Fuel planning is a form of route planning. The most inexpensive station in town won’t be of much value if the canopy is too low, the pumps are poorly positioned or the exit means a sharp turn into traffic.
Please check satellite view before committing. Look at entry/exit path, canopy, entry/exit pump lane, and if you can swing wide.
Check Weather and Wind
Windy routes can make it hard to drive along an interstate. Stopping distance will increase if heavy rain occurs. Closed roads, snow, wildfire and flooding can wipe out a route completely, due to the seasonal conditions of mountain roads. Save official state DOT pages for states you will be going through.
Step 5: Verify Campground Access Before You Book
If a campground states that they accommodate 30ft ask her or him what this means. RV length, trailer box length, total combination length, or parking pad length? Does the tow car fit as well?
This is where RV length restrictions come into play. Even if a site is shown on paper to be long enough, it may be difficult to back in due to trees, boulders, slope, narrow loop road, or the angle of the pad.
Recent reviews might include such phrases as "tight loop," "low branches," "steep entrance," "washed out road," "no maneuvering room" and "big rigs use second entrance. Please call before booking if the site is marginal. Inquire about access, low trees, best entry, turn radius, level of the site, and if there is a better location of your set-up.
Step 6: Build a Route Buffer for Real-World RV Travel
It will take longer to travel by RV than by car. Time is consumed during fuel stops, set up, dump stations, grocery stops, propane stops, traffic, road work and campground check-in.
A realistic RV trip planning checklist should also take into consideration reduced driving days; particularly if you’re making a trip across mountains, into a national park or to an unfamiliar campground.
Prior to leaving, make alternate fuel stop, overnight and safe pull-off at end of day. Download maps offline, save bottoms of campground confirmations, do screen shots of gate codes and have a paper map atlas on hand.
Common RV Route Planning Mistakes to Avoid
Every app has gaps. Plan with your RV GPS app, get traffic and satellite images from maps, closure information from official sources and directions to campgrounds for the final stretch of your route.
Dry weight and factory height are good beginnings, not driving data. Always measure and weigh the rig while in use.
It can be a great camp site but an awful road in. Make sure of access before making a reservation.
600 car miles in an RV can seem like a long, long way. Allow for slow climbs, long stops and set up in daylight.
Even the best RV road can go awry at the pump. Be sure to verify station before making commitment and running out of gas.
Quick RV-Safe Route Planning Checklist
- Take the true RV height, length and width and total combination length measurements.
- Check loaded weight or use conservative calculations of weight numbers.
- Make sure you input correct measurements into your RV route planner.
- Check low bridges, tunnels and clearance restrictions.
- Check weight restricted roads and restrictions.
- Inspect grades, mountain passes and descent conditions.
- Check closures, construction, weather and wind.
- Select fuel stops that offer access for RV’s.
- Check the turn radius, length of campgrounds and entrance roads.
- Store offline maps, reservations, backup stops and a paper route.
- If your app doesn’t agree with you, you have to obey the signs.
FAQ
Can I use Google Maps for RV trips?
Yes, but it’s a support tool. Google Maps can be used for traffic, local searching, satellite view and general navigation, but it cannot always be used to find a route that takes into account RV size, weight, propane restrictions, and campground access. Use it in conjunction with an RV planner and official road/park info.
What is the best way to avoid low bridges in an RV?
Be familiar with your true height, use an RV specific low clearance tool or planner, check the clearance on any road you are unsure of, and follow clearance markings. Don’t just use one application to catch all bridges, tunnels, canopies or tree limbs.
How do I know if my RV will fit in a campsite?
Look for longer than the max length listed, but compare the max length listed to your actual length of setup. Look for back-in or pull-through, angle of approach, does the tow bar fit in the vehicle, tree, slope, and tight roads. If the fit is tight, call the campground.
Do RV route planners avoid steep grades?
Various tools may display grade, elevation or road warnings, but there are fluctuations in features. Before driving: Check mountain pass information, State DOT status, weather and alternate routes. Reduce speed prior to downhill sections, apply correct braking methods for rig.
Should I use a truck GPS for an RV?
While a truck GPS can be helpful for clearance and weight limits, it’s not a full fledged RV planning system. Other aspects that RV travelers should consider are campground access, propane, parking context, scenic-road restrictions and site-fit information.
The Road Decides Unless You Plan First
There is nothing to fear in good RV safe route planning. It’s about respecting the size of the rig and providing you with options. When you have taken the tough decisions out of the way before arriving at the low bridge or steep grade, you’ll find that the best RV days are relaxed.
Measure the rig. Take advantage of an RV route planner. Cross-check the details. In case the fit is close, contact the campground! Next, head the windshield toward the next area of America that has a trek geared for the vehicle you are actually driving.